How to sharpen a chainsaw the right way
Every cutting attachment needs care: sharpen the saw chain of your STIHL chainsaw regularly to ensure top performance.
12.11.2024


How can I recognise that my saw chain is blunt?
Even the best saw chains become blunt over time. Once this happens, work becomes more strenuous and the chainsaw is exposed to increased wear. In addition, it puts more physical strain on you, and the cutting result becomes less and less satisfactory.
If you notice the following signs when working with your saw, you need to sharpen your saw chain or maybe even replace it.
Five signs of a blunt saw chain
Sign no. 1
The saw chain does not pull itself into the wood. It needs to be forced to cut by applying pressure on the powerhead.
Sign no. 2
The saw chain produces fine sawdust instead of coarse chips when cutting or cutting to length, i.e. when cutting vertically through the wood.
Sign no. 3
Smoke is produced in the cut despite chain lubrication and correct chain tensioning.
Sign no. 4
The chainsaw pulls in one direction and the cut becomes crooked. This is particularly indicative of blunt or unevenly long teeth on one side.
Sign no. 5
The chainsaw chatters and bounces when sawing. Precise positioning is difficult.

Video guide: Sharpening the saw chain and depth gauge with the STIHL 2-in-1 file holder
Our video guide will show you how to sharpen the saw chain and depth gauge of your STIHL chainsaw in a single operation with the 2-in-1 file holder.
What is the depth gauge setting?
The depth gauge setting is the distance between the leading edge of the top of the saw tooth and the top edge of the depth gauge. The greater this distance is, the more wood is planed per tooth.
The depth gauge setting decreases when the saw teeth are sharpened. This is because the saw tooth becomes shorter and also flatter due to its shape (thinner and flatter towards the rear) during sharpening.
In order to achieve a good cutting result, the depth gauge setting must therefore be checked and adjusted if necessary every time you sharpen your chainsaw.

Sharpen your chain with a round saw chain file
You can sharpen the cutting teeth of your chipper tooth saw chain yourself using a round file. However, the tool you use must match the saw chain. If you use the wrong file you can actually reduce the cutting performance of the chain. We will explain how to select the right round file.
The right round saw chain file to choose depends on the chain pitch of your saw chain. Each chain pitch is assigned a specific round file diameter.
Choosing the right round file for sharpening your chainsaw
The chain pitch assigns a chain to certain chainsaw performance classes. You can easily find out the chain pitch for all STIHL saw chains by checking the identification number on the depth gauge. You can then simply check the required file diameter in the STIHL conversion table.

If the number on the depth gauge is no longer legible, the chain pitch can be determined by means of a chain reference gauge. Alternatively, you can calculate the chain pitch. For example, you would measure the distance from the centre of one riveted bolt to the centre of the next one using a calliper, and divide the result by two to obtain the chain pitch in millimetres. However, since the chain pitch is always in inches, you will still need to convert the result accordingly: one millimetre equals 0.039 inches, which means that you must multiply the measurement in millimetres by 0.039 to obtain the corresponding value in inches. Once you have calculated the value, simply search for the corresponding saw chain file diameter in the STIHL conversion table:
| Marking on the depth gauge | Alternative marking on the depth gauge | Chain pitch | Round file diameter |
|---|---|---|---|
| 1 | 1/4 | 1/4" | 4.0 millimetres |
| 2 | 325 | .325" | 4.8 millimetres |
| 3 | 3/8 | 3/8" | 5.2 millimetres |
| 4 | 404 | .404" | 5.5 millimetres |
| 6 | P, PM | 3/8” Picco | 4.0 millimetres |
| 7 | 1/4” Picco | 3.2 millimetres |
Worth noting
Please note that saw chain files have a different file cut – in other words a different surface structure – from workshop files, for example. The latter are therefore generally unsuitable for sharpening saw chains.
How to sharpen a chainsaw: instructions
Once you have selected the right round file, make sure that your work area is safe. In addition to the right tools, you will need enough space and should wear gloves made of resistant material for your own safety.
Clean the saw chain and check it for damage. Then tension the chain a little so that the teeth can be sharpened more effectively. Use a felt tip pen to mark a master tooth that will be used as a measure for all other teeth.
Make sure that the wear marking has not yet been reached. If it has, we recommend replacing the saw chain completely.

Guide the file by holding the handle with one hand and passing the file in forward strokes past the tooth with the other . Start with the master tooth and place the file in the tooth so that it can be guided along the tooth while applying pressure from the inside outwards.
Always file at a 90-degree angle to the guide rail. The file should only sharpen on the forward stroke – lift the file off for the backstroke. Rotate the file at regular intervals to avoid one-sided wear of the file.
STIHL saw chains are sharpened at a 30-degree sharpening angle as standard – if you use a filing aid (e.g. a file angle plate), you can easily orientate your movements to the markings on it to maintain the correct angle.
Guide the file so that a quarter of the file diameter protrudes beyond the top of the tooth. File the master tooth until a perfect cutting edge is achieved. We recommend that you file more frequently as part of your regular maintenance. This eliminates the need for time-consuming filing involving higher levels of material removal.

If you can see any light reflections on the cutting edge, the blade tooth is not yet sharp.
You can only assume that the blade tooth is properly sharpened when there are no more light reflections.
Then file all the blade teeth on this side to the same length. Next, turn the chainsaw 180 degrees and file all the blade teeth on the other side. Make sure that you file all the blade teeth to same length as the master tooth.

As you sharpen the saw tooth, the depth gauge setting will automatically decrease. Once you have sharpened all the cutting teeth, you must check the depth gauge setting and adjust it if necessary. To check the depth gauge setting, use the appropriate filing gauge for the chain pitch.
To do this, simply place the filing gauge onto the saw chain. If the depth gauge protrudes beyond the filing gauge, it needs to be reworked.
Using a flat saw chain file, file the depth gauge horizontally so that it is flush with the filing gauge. For saw chains with humped drive links, the humps are worked on at the same time as the depth gauge. If the depth gauge is at the correct height, file the top of the depth gauge at an angle parallel to the service marking on the chain – do not lower the highest point of the depth gauge any further. Be careful not to touch the freshly sharpened blade tooth with the flat file. If the depth gauge is too low, it will increase your chainsaw’s kickback.
Theoretically, it is also possible to adjust the depth gauge without a filing gauge. In order to do this, you must work with the service mark at all times. However, this type of freehand sharpening is more prone to errors, which is why we recommend using a filing gauge. Caution: Always use a flat file to reset the depth gauge. Round files are unsuitable for this task!

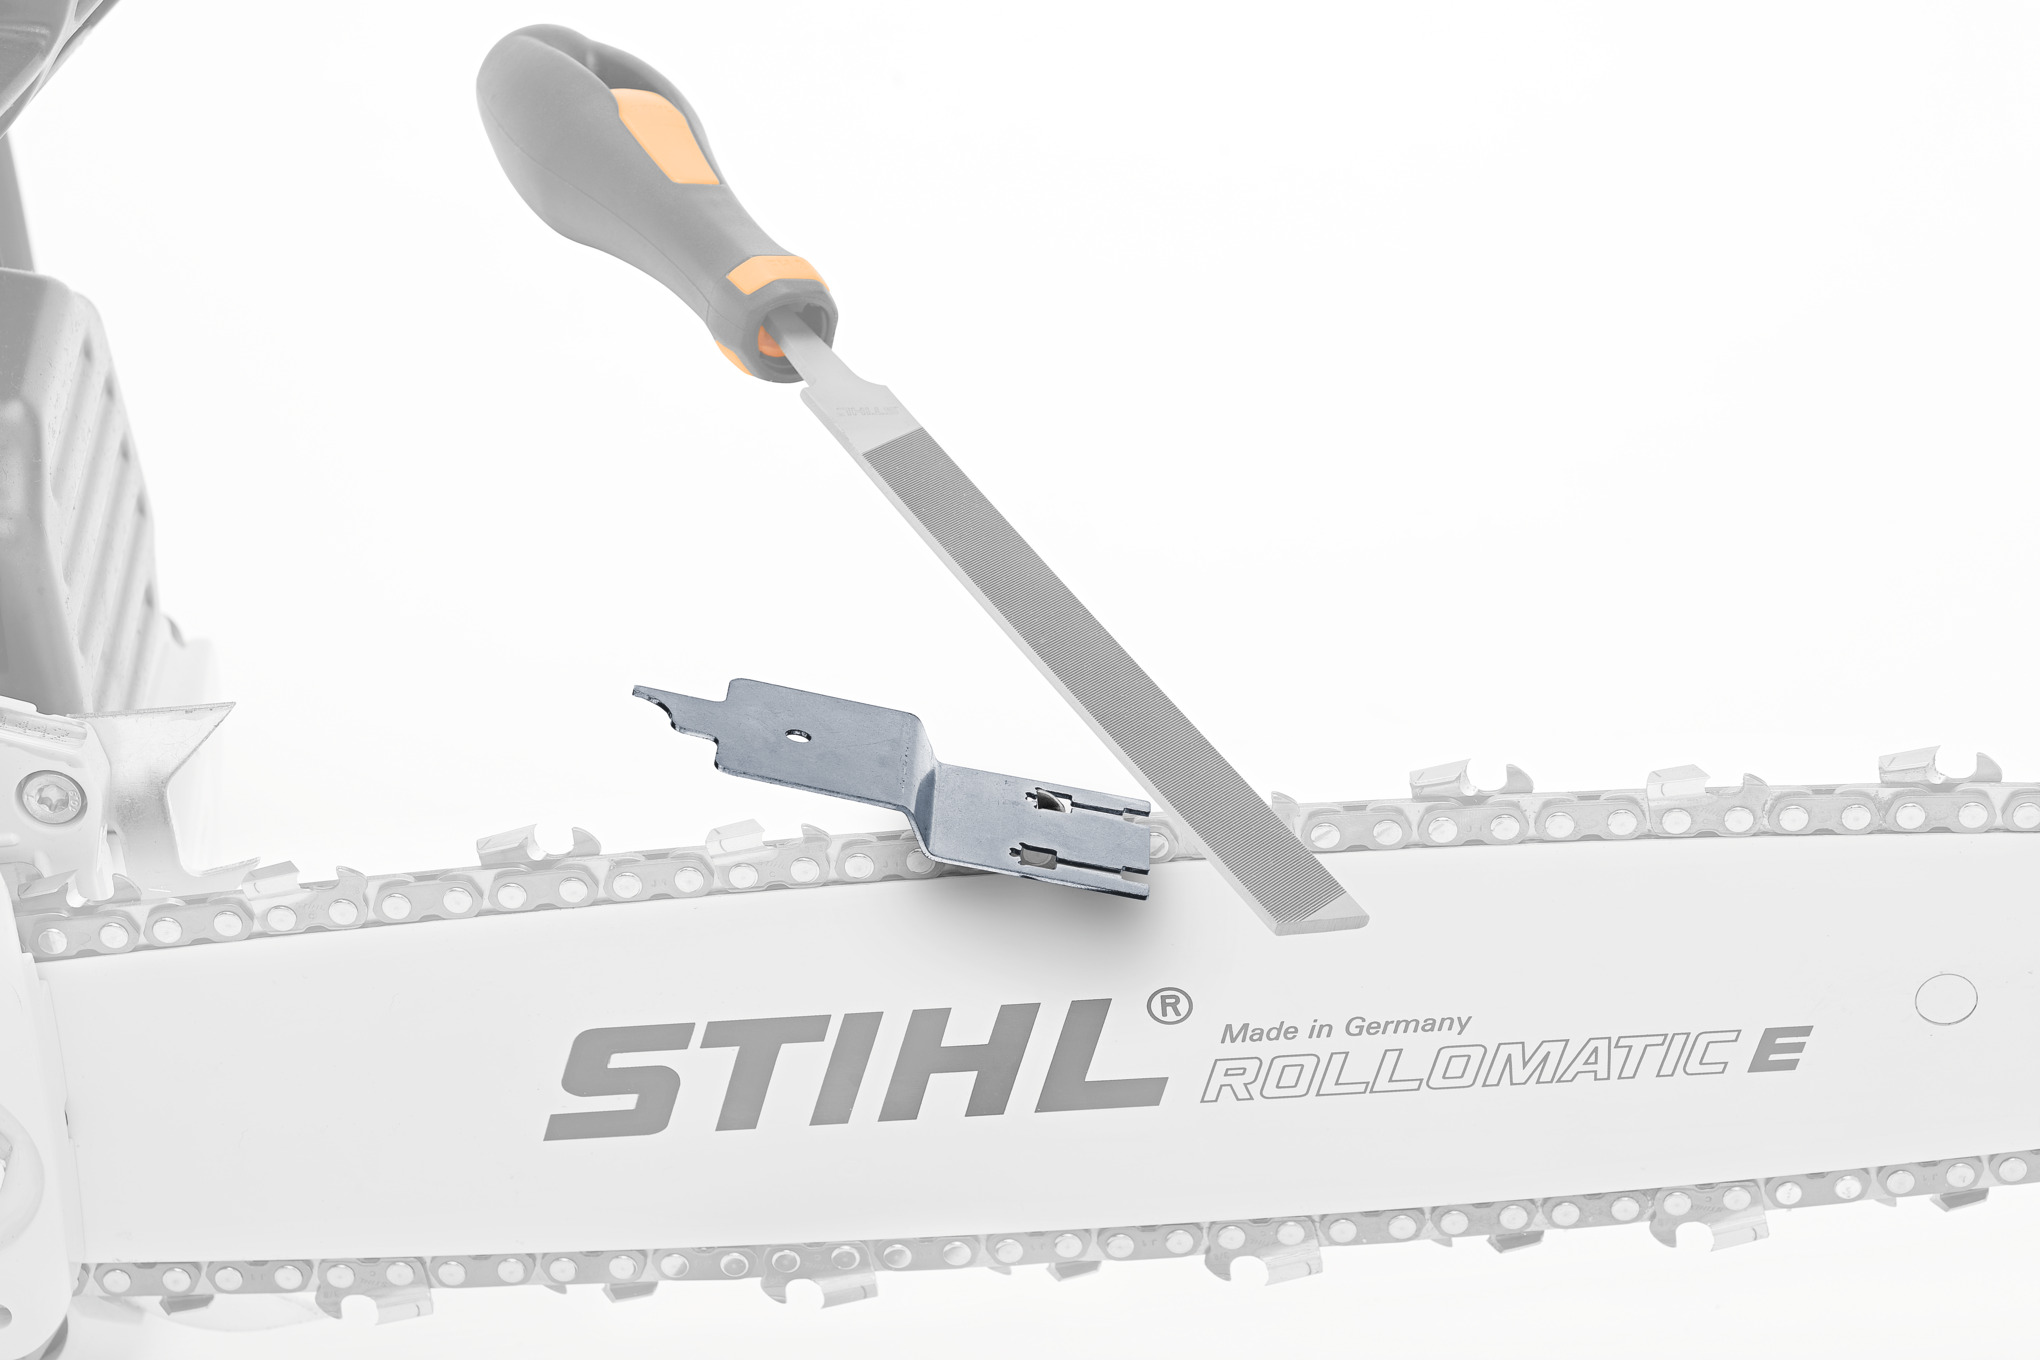
Product tip: you can use the the 2-in-1 file holder to sharpen the teeth of your saw chain and reset the depth gauge to the correct height at the same time.
Sharpening the STIHL HEXA saw chain
Sharpening has never been so easy: The innovative STIHL 3/8" Rapid Hexa saw chain can be sharpened using the specially developed hexagonal Hexa saw chain file – without any additional sharpening aids. The new hexagonal file is perfectly adapted to the innovative shape of the Hexa blade tooth, and allows for fast and virtually perfect sharpening of the saw chain at the ideal sharpening angle. Watch our video to see exactly how it works. Thanks to its innovative tooth shape, the Rapid Hexa saw chain is also highly durable and offers a 10 percent improvement in cutting performance compared to the 36 RS.
Video: The 3/8" Rapid HEXA saw chain from STIHL

To sharpen your Rapid Hexa saw chain, position the hexagonal file at a 90-degree angle to the guide bar. The bead should point upwards and run parallel to the markings on the tooth, automatically producing the ideal sharpening angle of 25 degrees.
Hold the handle with one hand and guide the file along the tooth with the other, using forward strokes only. Lift the file up from the tooth on the backstroke to ensure that you file on the forward stroke only. Then adjust the depth gauge – See step 3 above for detailed instructions.
Softwood or hardwood? Adjusting the depth gauge optimally
The depth gauge is part of the blade tooth of the saw chain. It determines how deep the incisor penetrates into the wood when sawing with your chainsaw and how much wood it planes off in the process. For optimum cutting performance, the depth gauge setting must therefore be correct for the type of wood you are working with. We will explain what you should look out for.
The depth gauge and wood type should be coordinated
Each type of wood behaves differently during sawing. With the right depth gauge setting, you can make the work easier for yourself and your saw. We recommend that you consider the type of wood you usually saw when purchasing the chain.

Hard woods are more resistant to sawing than soft woods. Therefore, the depth gauge setting should not be too high when sawing hard wood. When cutting softwood outside the frost season, the setting can be up to 0.2 mm larger. The filing gauge of the next larger chain pitch can be used to do this. STIHL also offers a special filing gauge that can be used to directly determine the optimum depth gauge distance for hard and soft wood.
The chain pitch provides orientation when selecting the depth gauge distance. The table above shows how large the depth gauge setting should be for hard wood.
More tips and tricks for sharpening your chainsaw
- Start by marking a blade tooth with a felt tip pen. The marking will help you check that the material is being removed evenly. After two to three filing strokes, check how much material has been removed. If the material has been removed evenly, you’re filing correctly. If the felt tip marking has only been removed in some places, check that you are using the correct file and make sure that you are not holding the file too high or too low.
- Do not keep working with your saw chain until it is completely blunt – it just takes a few strokes of a file to keep your saw chain sharp.
- Count the file strokes and apply the same number to each blade tooth; this process will wear all the teeth to an equal length.
- If you find that the blade teeth in one row are shorter than those in other rows, you have applied greater filing pressure to one side. Even out the length of the teeth by performing one to two additional file strokes on the longer teeth.
- Product tip: You can use the 2-in-1 file holder to sharpen the teeth of your saw chain and reset the depth gauge to the correct height at the same time.
Operating instructions for STIHL chainsaws
You can easily download the operating instructions for your STIHL chainsaw here.
Overview: How to sharpen a chainsaw
A blunt chainsaw makes your work harder and is less safe
Sharpening your chainsaw requires minimal preparation and is easy with the right tools
- Use a suitable round saw chain file for sharpening the teeth of your chainsaw
- You should also read the operating instructions for your chainsaw when carrying out maintenance work such as sharpening
The angle at which chainsaw teeth should be sharpened is around 30 degrees. Filing aids such as a file angle plate have markings to show you the correct sharpening angle. This means you can precisely sharpen your chainsaw yourself.
How often you need to sharpen your chainsaw depends on several factors. You should always sharpen your chainsaw if the chain no longer pulls itself into the wood, if only fine sawdust (rather than large chips) is produced when cutting wood to length, or if cutting at an angle or precise positioning becomes difficult. Smoke production can also be an indication of a blunt saw chain.
A round saw chain file is best for sharpening your chainsaw. You can determine the correct file diameter based on the chain pitch. STIHL saw chains have a marking on the depth gauge that indicates the recommended round file diameter.
Saw chain sharpening is very inexpensive. Your STIHL dealer can perform all the necessary work with professional tools in a short time, so your saw chain will quickly be perfectly sharp again.
How quickly a chainsaw becomes blunt depends on the duration and intensity of its use. To achieve the best cutting results in the long term, you should not carry on working with your chainsaw until it is completely blunt; instead, it’s best to keep the saw chain keen with a few file strokes in between uses so that you can work optimally at all times.
You can get your chainsaw sharpened at your STIHL dealer. By taking it to your dealer, you can ensure that your chainsaw is optimally sharpened with professional tools and is quickly ready for use again.


